
Start બટન છોડતાં DOL Starter કેમ બંધ થાય છે?
Mohit Vekaria
DOL Starter હોલ્ડ થતું નથી અને Start છોડતાં જ બંધ થાય છે, તો પહેલા ખાતરી કરો કે Start દબાવ્યું ત્યારે motor ખરેખર ફરી કે ફક્ત ક્લિક થઈ. સામાન્ય three-wire circuitમાં Start છોડ્યા પછી coil ચાલુ રાખવાનું કામ holding circuit કરે છે. બટન છોડવાની સાથે motor બંધ થાય છે કે થોડા સમય પછી fault આવે છે, તે ચોક્કસ નોંધો.
Holding circuit કેવી રીતે કામ કરે છે?
સામાન્ય starterમાં momentary Start, Stop અને contactorનું auxiliary contact હોય છે. Start દબાવતાં બટનની સ્થિતિ બદલાય અને છોડતાં પાછી થાય. Control circuitની શરતો પૂરી હોય તો coil સક્રિય થાય છે. Contactor ખસે ત્યારે auxiliary contact બંધ થાય છે. એ સંપર્ક બટન છોડ્યા પછી coil માટે બીજો માર્ગ આપે છે. Stop અથવા overload trip એ માર્ગ તોડી શકે છે.
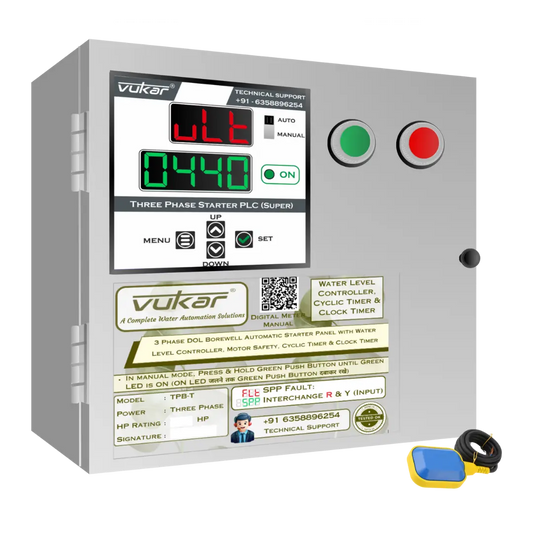
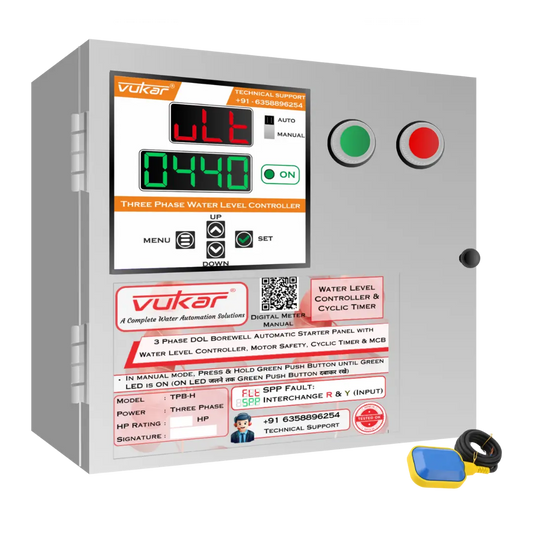
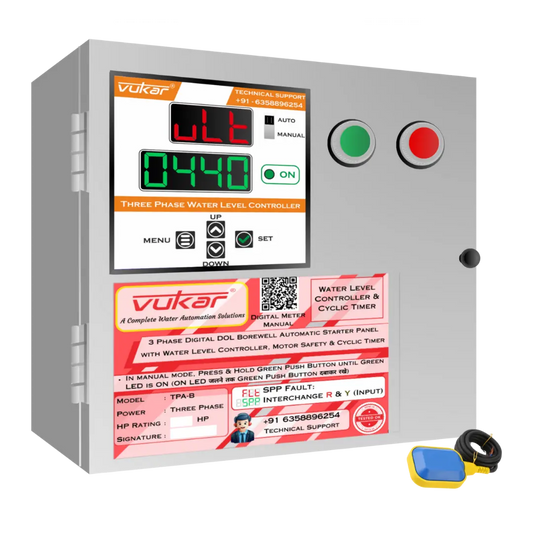
Three-wire અહીં commandની ગોઠવણ બતાવે છે. Motor phaseની માહિતી motor nameplate અને drawing પરથી મળે છે. Schneiderની three-wire control નોંધ ચોક્કસ soft starter પર છે. તેમાં momentary input અને seal-inનો વિચાર સમજાય છે. Hardwired DOL માટે VUKARનો સામાન્ય circuit reference જુઓ.
| ક્રમ | શું નોંધવું |
|---|---|
| Start દબાવ્યું | Pickup, Run lamp અને motor ફરી કે નહીં |
| Start છોડ્યું | તરત બંધ, delay પછી બંધ કે fault સાથે બંધ |
| Motor ઊભી થઈ | Display પર Stop, Trip કે Run request |
આ observations સામાન્ય અને દેખરેખ હેઠળના સુરક્ષિત સંચાલનમાંથી લો. પહેલાની ઘટના નોંધેલી હોય તો એનો ઉપયોગ કરો. વધુ Start આપવો યોગ્ય ન હોય તો થયેલી ઘટનાનો સમય જ ઉપયોગી છે.

Auxiliary contact ક્યારે પહેલા તપાસાય?
ધારો કે Local starter દર વખતે Start દબાવતાં motor ચલાવે અને બટન છોડતાં તરત બંધ કરે. કોઈ protective alarm દેખાતું નથી. Technician drawingમાં holding path શોધીને auxiliary contact, તેની mechanical actuation અને approved connections જુએ છે. Service પછી ખોટો block અથવા ખોટા terminal પર જોડાણ પણ આવું વર્તન આપી શકે.
એક ઉદાહરણમાં contactor બદલ્યો એ પહેલાં motor યોગ્ય ચાલતી હતી. નવા contactorમાં Start પકડી રાખો ત્યાં સુધી ચાલે છે. જૂના અને નવા part numbers, auxiliary blockની ઓળખ અને drawing revision મોકલો. બન્ને contactors પર એક જ motor power લખેલી હોય તો પણ auxiliary contactનું કામ અથવા સ્થાન બદલાઈ શકે. Technician actual part સામે drawing મૂકી તફાવત શોધશે.

Run command controller સાચવે ત્યારે
Digital panel અથવા PLC run request programમાં રાખી શકે છે. એ ગોઠવણમાં conventional drawing જેવો holding auxiliary contact હોવો જરૂરી નથી. Start input મળ્યું હોય છતાં feedback, permissive અથવા command modeને કારણે output બંધ થઈ શકે. કોઈ system બહારથી સતત રહેતો maintained signal માંગે છે. તેથી run command કોણ જાળવે છે તે પહેલા સમજો.
Selector, command source અને indications લખો. Remote display પર “Start request on” અને “Run feedback off” હોય તો બંને નોંધો. બટન છોડતાં બંને off થાય તો command controller સુધી કેવી રીતે જાય છે તે અલગ રીતે જોવું પડે. Lampનો રંગ લખવા સાથે તેનો exact label આપો.
VUKARના ત્રણ-phase DOL variantsમાં timer અને level-control options જુદા છે. ત્રણ-phase model સરખામણીમાં family ઓળખો. Exact model guide પ્રમાણે Local, Auto અથવા Remoteનું observed વર્તન લખો.

બટન છોડવાનો સમય, delayed trip અને vibration
09:02:10એ Start આપતાં motor ફરી અને બટન છોડતાં તરત બંધ થઈ. આ timing holding path અથવા controller request તરફ દોરી જાય છે. Motor 30 seconds સારી ચાલી અને પછી trip થઈ હોય તો displayed code અને trip device વધુ ઉપયોગી છે. બીજી machine શરૂ થાય ત્યારે contactor ધ્રૂજે તો બીજી ઘટનાનો સમય પણ લખો. Schneider chatter guidance control contacts, input devices અને low voltageને શક્ય કારણો તરીકે સમજાવે છે.
એક કરતાં વધારે Start stations હોય તો સમસ્યા કયા station પર થઈ તે લખો. બે stations એક holding path શેર કરી શકે, પણ તેમનાં inputs જુદાં હોઈ શકે. પહેલાથી નોંધાયેલો comparison હોય તો ઉમેરો. અજમાવવું અસુરક્ષિત હોય ત્યારે વધુ test વગર serviceને જાણ કરો.

Command અને feedback જુદા લખો
Command machineને ચાલવા કહે છે. Feedback controllerને output, contactor અથવા machineની સ્થિતિ વિશે જાણ કરે છે. કેટલાક designs feedback આવે પછી જ આગળ વધે છે. બીજા designs ફક્ત તેને screen પર બતાવે છે. Installed equipmentની drawing અને operating descriptionથી એ જાણી શકાય છે.
Software update પછી તકલીફ શરૂ થઈ હોય તો revision અને updateની તારીખ આપો. Technician જોઈ શકે કે feedback timer પૂરો થતાં output બંધ થાય છે કે operator command release સાથે જ જાય છે. જો auxiliary block બદલ્યો હોય તો બન્ને part numbers પણ નોંધો. એક જ “starter ખરાબ” શબ્દથી આ જુદા clues ગુમ થઈ જાય.
Service માટે લખવાનું ઉદાહરણ
“Local Start દબાવતાં contactorની ક્લિક આવી અને motor ફરી. બટન છોડતાં તરત બંધ થઈ. કોઈ trip indication નહોતું. ગઈકાલે contactor બદલાયો. Drawing revision અને labelના ફોટા જોડ્યા છે.” જો બીજી shiftમાં યોગ્ય ચાલ્યું હતું તો સમય અને station ઉમેરો. જો motor movement અંગે ખાતરી ન હોય તો તેમ જ લખો.
Start button પકડીને કામ ચાલુ રાખશો નહીં. Stop અથવા protection pathમાં workaround ન કરો. તાલીમ ધરાવતા technicianને siteની isolation અને verification procedureથી કામ કરવા દો. Hazardous energy control overview servicingમાં સલામત સ્થિતિની ખાતરી સમજાવે છે.
Contact block બદલાયો તે પહેલાં અને પછીનો record
Contactor અથવા auxiliary block બદલવાનો સમય અને પ્રથમ failed startનો સમય સાથે રાખો. કોઈએ સવારે contactor બદલ્યો અને બપોરે control cable ફરી જોડ્યો હોય તો બન્ને કામ અલગ લખો. બે events વચ્ચેનું અંતર technicianને કયો work record પહેલાં વાંચવો તે સમજવામાં મદદ કરશે. જૂનો component પાછો મળે તો નામ અને part numberથી ઓળખ આપો. માત્ર ampere rating કે દેખાવથી auxiliary contactનું કાર્ય જાણી શકાતું નથી.
સફળ test અને failure વખતે કયો Start station વપરાયો હતો તે સરખાવો. ગયા દિવસે Remoteથી motor ચાલી હતી એટલા પરથી Local pushbuttonની holding વ્યવસ્થા યોગ્ય હતી એવું સાબિત થતું નથી. બન્ને નોંધ ઉપયોગી છે. દરેકની સાથે station, mode અને active indication રાખો. Selector પર અલગ label હોય તો વાસ્તવમાં લખાયેલું નામ આપો. “Auto” અને “Remote” જેવા શબ્દો અલગ panelsમાં જુદા અર્થમાં વપરાઈ શકે.
Feedback માટે ત્રણ observation points
| હાલત | Command | Feedback |
|---|---|---|
| Start પહેલાં | Request બતાવતો status | Run બતાવતો status |
| Start દબાવતાં | Request બદલાય છે કે કેમ | Feedback આવ્યો હોય તો નોંધ |
| Start છોડતાં | Command રહે છે કે જાય છે | તરત કે delay પછી ફેરફાર |
આ labels ઉદાહરણ છે. Actual screen “Output active” કહે તો એ જ phrase લખો. એને “motor running” ગણશો નહીં. Output અને motorની ચળવળ વચ્ચેનો ફરક આગળના service workમાં જરૂરી બની શકે. Motor guardની અંદર અથવા બીજી જગ્યા પર હોય ત્યારે movement અંગે ખાતરી ન હોય તો recordમાં ખાલી રાખવા કરતાં “જોયું નથી” લખો.
બીજા exampleમાં Start દબાયું, motor ફરવા લાગી અને બટન સામાન્ય રીતે છોડાયું. બે seconds પછી controllerએ Run output દૂર કર્યો. Event logમાં feedbackની રાહ દર્શાવતી entry છે. આ ઘટના બટન છોડતાં જ dropout થવાથી જુદી છે. Start, release અને output offનો સમય અલગ આપો. Exact seconds લખી શકાય નહીં તો “અંદાજે બે seconds” લખો. Technician સાચી timing સાથે programનાં જુદા પગલાં જોઈ શકે છે.
એક જ symptom જુદા કારણ સુધી લઈ જઈ શકે
Contact block replacement પછી ફક્ત Local Start પર dropout હોય અને Remote command જળવાય, તો Local input અને તેના holding pathમાં કઈ ગોઠવણ છે તે પૂછવું વાજબી છે. બન્ને modesમાં એક જ delayed dropout હોય તો shared output અથવા feedback rule વધુ ઉપયોગી પ્રશ્ન બની શકે. આ observations આખરી diagnosis નથી. Technician જરૂરી evidence અને site procedureથી તે કરી શકે.
કોઈ Stop અથવા protection device પણ સાથે indication બતાવતું હોય તો તેની exact entry જુદી આપો. Protection event થઈ હોય ત્યારે પણ motor બંધ થઈ શકે છે. Fault clear કર્યા પછી screen સામાન્ય થઈ ગઈ હોય તો પહેલાનો ફોટો અથવા event history વધુ કામ આવશે. “બટન છોડ્યું અને motor બંધ” સાથે “એ જ વખતે protection code દેખાયો” એવો આખો record આપો. એક જ નિષ્કર્ષ લઈને બીજા eventને અવગણશો નહીં.
Repair પછી handoverમાં શું સાચવવું?
યોગ્ય technician કારણ ઓળખીને સુધારો કરે પછી normal Local Start, Remote command અને Stopનું અપેક્ષિત વર્તન સમજાવે તે ઉપયોગી છે. Demonstration siteના operating rules પ્રમાણે હોવું જોઈએ. કયા modeમાં test થયું, કયો component બદલાયો અને drawingનું revision કયું છે તે work noteમાં લખાવો. આથી આગળનો operator યોગ્ય mode changeને fault માની લે તેવી શક્યતા ઘટે છે.
એક જ operating modeનો test શક્ય થયો હોય તો તે modeનું પરિણામ જ લખો. બીજાં modes અંગે “હજુ ચકાસવાના” લખી શકાય છે. Example તરીકે Local Start ત્રણ વખત normal રહ્યો પણ Remote station ઉપલબ્ધ નહોતું, તો બન્ને વાતો જુદી આપો. આગળના electricianને પ્રથમ test ફરી કરવાને બદલે બાકી પ્રશ્નથી શરૂઆત કરવાની તક મળે છે.
Old partની photo, replacement label અને failed attemptની નોંધ એક જ folderમાં રાખો. Exact station અને drawing revisionનો ઉલ્લેખ filename અથવા descriptionમાં રાખવાથી આગામી maintenance visitમાં શોધવાનું સરળ બને છે. ત્યાર પછી કોઈ બીજા panelમાં સમાન લક્ષણ દેખાય તો બન્ને ઘટનાઓને અલગ equipment IDs સાથે લખો.
VUKAR DOL Starter પસંદગી માર્ગદર્શિકા · DOL Starter power અને control diagram
એક જ panelમાં બે contactors હોય તો કયો ખસ્યો હતો તે અવાજ પરથી માની લેવાને બદલે front indication અને drawing reference આપો. એ detailથી technician control sequence સાચી જગ્યાથી જોશે.