
DOL Starter Coil Voltage: યોગ્ય Replacement Coil કેવી રીતે મેળવવી
Mohit Vekaria
DOL starter coil voltage control supply સાથે મેળવો. જૂની coil પર voltage, AC કે DC અને AC coil માટે frequency વાંચો. Manufacturerના datasheetમાં આખો part code મેળવો. Starter 415 V three-phase motorને switch કરી શકે અને એની coil 24 V DC પર હોઈ શકે છે. Motor supply અને coil supply circuitમાં જુદાં કામ કરે છે.
બે contactors દેખાવે સરખા અને ampere ratingમાં સરખા હોઈ શકે. એકની coil 24 V DC અને બીજીની 230 V AC હોઈ શકે. Supplierને ફક્ત ampere ratingનો ફોટો મોકલવાથી યોગ્ય પસંદગી મુશ્કેલ છે. આખા model code અને coil markનો અલગ સ્પષ્ટ ફોટો આપો.
Coil voltage માટે કયો label વાંચશો?
Coil marking પાસે rating જુઓ. Datasheetમાં Uc rated control circuit voltage બતાવે છે. Schneider TeSys D rangeમાં A1 અને A2 coil terminals છે. Marking front, side અથવા કાઢી શકાય તેવી coil પર હોય શકે. Panel ખોલવું પડે ત્યારે qualified electrician સલામત isolation પછી label વાંચે. Schneider TeSys D terminal guide.
Main contacts માટે switching voltage, motor current અથવા AC-3 rating જુદી મળે છે. Coil માટે અલગ control rating વાંચો. બંને circuits સમજવા DOL starter power અને control diagram જુઓ.

એકસરખા લાગે એવા ત્રણ part codes
આ ત્રણ TeSys D models માટે published motor switching rating 9 A AC-3 છે. આખા codeના અંતમાં coil version બદલાય છે. બીજા makerનો suffix તેની પોતાની listમાં જ જુઓ.
ધારો drawingમાં 24 V DC control supply છે અને જૂનો contactor LC1D09BD છે. ફક્ત “LC1D09, 9 A, 24 V” લખો તો AC version આવી શકે. Enquiryમાં “LC1D09BD, 24 V DC coil” લખો. બીજો model સૂચવાય તો datasheet અને auxiliary contactsની યોગ્યતા પૂછો.

Control circuitને supply ક્યાંથી મળે છે?
Panelમાં DC power supply, control transformer અથવા AC feed હોઈ શકે છે. Stop button, overload contact, timer અને float switch coil ક્યારે ચાલે તે નક્કી કરે છે. Float switch relayને command આપે અને coil અલગ supply લે એવું પણ હોઈ શકે. Exact drawingથી rating જાણો.
AC coil માટે frequency અને manufacturerની voltage range જુઓ. DC coil અથવા suppression module પર polarity દર્શાવી હોય તો exact partની સૂચના અનુસરો. કેટલીક electronic coils ચોક્કસ rangeમાં AC અને DC બંને સ્વીકારે છે. TeSys Greenના કેટલાક variants માટે Schneider polarity note જુઓ.
Panelમાં પહેલાં ફેરફાર થયો હોય તો drawing, supply label અને fitted coil mark સરખાવો. Door label incoming motor supply બતાવી શકે છે અને જૂના repair પહેલાંનું પણ હોઈ શકે. Records જુદાં હોય ત્યારે qualified electrician circuit ઓળખીને approved replacement નક્કી કરે.

Drawing, door label અને fitted coil જુદાં હોય ત્યારે
એક panelના door પર 415 V three-phase લખેલું છે એવું ધારો. અંદરના contactorના full codeથી 24 V DC coil ઓળખાય છે. જૂની drawingના control ભાગમાં કોઈ બીજું voltage છે. Door label motor supply માટે હોઈ શકે છે. જૂની drawing repair પહેલાંની હોઈ શકે છે. Actual coil અને current control circuitની ઓળખ qualified electrician દ્વારા થવી જોઈએ. Enquiryમાં ત્રણેય labelsના photo અને drawing revision આપો. અજાણી spare coil energize કરીને guess કરવાને બદલે approved documentation મેળવો.
બીજા ઉદાહરણમાં સમાન HPની બે motors છે. Pump Aના panelમાં control transformer છે અને Pump Bના panelમાં DC supply તથા controller છે. બંને starterની spare part list HP પ્રમાણે જ લખાય તો ખોટી coil જઈ શકે. Spare cabinetમાં panel ID, full contactor code અને coil rating સાથે label રાખો. Supplier પાસેથી નવી markingનું datasheet મેળવીને repair logમાં ઉમેરો.
Supplierના quotationમાં શું વાંચશો?
Order acknowledgement પર complete model code અને coil suffix સરખાવો. Alternative model suggest કરે તો equivalent કયા ratings અને કઈ application માટે છે તે પૂછો. Main contactsની motor-switching duty, auxiliary blocks, overload mounting અને enclosure clearance પણ જુઓ. Separate suppression module હોય તો તેનો code, supply range અને AC/DC type અલગ લખાવો. Coil voltage match થાય છતાં accessory કે mounting ખોટું હોય તો panelનો approved design પૂર્ણ થતો નથી.
આખો contactor બદલાયો હોય ત્યારે જૂના partની તસવીર અને નવા partનો code બંને સાચવો. Replacement સાથે auxiliary block પણ બદલાય તો તેની detail ઉમેરો. પછી Start, Stop અને indicationના observed result માટે અલગ row રાખો. Actual fitted deviceનો record boxના labelથી જુદો રાખવાથી service history વધુ સ્પષ્ટ રહે છે. આગામી visitમાં બીજું fault આવે તો technician જૂના ફેરફારોની તારીખ જોઈ શકે છે.
ચેટરનું કારણ સમજવા operator શું નોંધે?
Contactor motor start પછી દર વખતે drop થાય છે કે માત્ર float હલે ત્યારે chatter કરે છે તે લખો. Panel display એ જ સમયે reset થાય છે કે નહિ તે પણ નોંધો. એક ઘટના control supply તરફ clue આપે છે. બીજી input અથવા feedback branch તરફ આપી શકે છે. Start command કોણે આપ્યો, Auto કે Manual mode હતો, કયો fault બતાવ્યો અને પાણીનું level શું હતું તે લખો. Technical readings site safety procedure હેઠળ યોગ્ય person લે.
Fault શરૂ થયો ત્યારે તાજો repair થયો હતો કે નહિ તે date સાથે નોંધો. Example તરીકે “મંગળવાર સવારે coil બદલાઈ, બપોરે Auto demand દરમિયાન ત્રણ clicks, display ચાલુ રહ્યું” એવું લખી શકાય. આ પૂરતું diagnosis નથી, પણ તે service teamને યોગ્ય orderમાં part number, connections અને demand history વાંચવામાં મદદ કરે છે. Repeat થાય ત્યારે panel operator approved instructions પ્રમાણે machine serviceમાંથી બહાર રાખે.

Power returnનો result handoverમાં રાખો
Normal Start અને Stop સફળ થયા છતાં supply પાછી આવે ત્યારે automatic pump શું કરશે તે અલગ condition છે. Handover sheetમાં supply return વખતે level request કે timer request active હતી કે નહિ તે લખો. Technician approved test મુજબ actual result note કરે. જો design deliberate restart માંગે છે તો operating instructionમાં તે સ્પષ્ટ લખેલું હોવું જોઈએ. Equipment ID, installer અને test date એક જગ્યાએ રાખો.
એક જ lineમાં “Pump A, LC1D09BD, 24 V DC coil” લખો અને તેની સાથે full labelનો ફોટો આપો. જો exact part મળે નહિ તો approved alternativeની mechanical fit અને control circuit compatibility લેખિતમાં રાખો. Supplier, electrician અને storekeeper ત્રણેય એ જ repair record વાપરે ત્યારે suffixનો આંક ખોટો વાંચવાની શક્યતા ઓછી થાય છે.
Click, buzz અને drop-out ક્યારે થાય છે?
Motor start પછી તરત contactor છૂટવો અને float switch બદલાય ત્યારે chatter થવું અલગ observations છે. Fault replacement પછી આવ્યો છે કે ફક્ત Autoમાં દેખાય છે તે લખો. બીજા control devices પર પણ અસર થાય છે કે કેમ જણાવો. Low voltage, poor control connections અને chattering inputs શક્ય કારણ છે. Schneider chatter guidance.
નવી coil પછી issue શરૂ થયો હોય તો જૂના અને નવા આખા part code મેળવો. Labels match થાય તો active command અને fault indication નોંધો. વારંવાર chatter, બળેલી ગંધ અથવા heat damage હોય ત્યારે panel serviceમાંથી બહાર રાખીને site isolation procedure અનુસરો. Energized diagnosis યોગ્ય technician કરે.
Coil પરની accessory પણ ઓળખો
Coil terminals પરનો module switching transient ઘટાડવા માટે હોઈ શકે છે. તેનો code અને connection નોંધો. Exact documentationથી voltage, AC કે DC અને જરૂરી polarity મેળવો. Controller અલગ relay switch કરી શકે છે. Dry contact switchની જેમ કામ કરે છે. એ પોતાની રીતે coil supplyનો આંક આપતું નથી. Repair noteમાં controller output અને coil rating અલગ લખો.
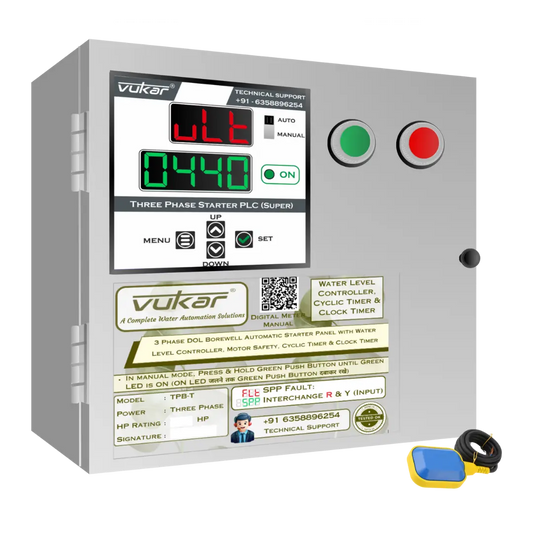
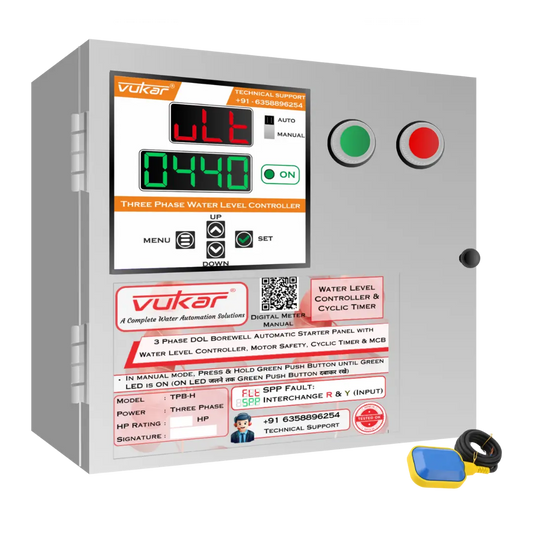
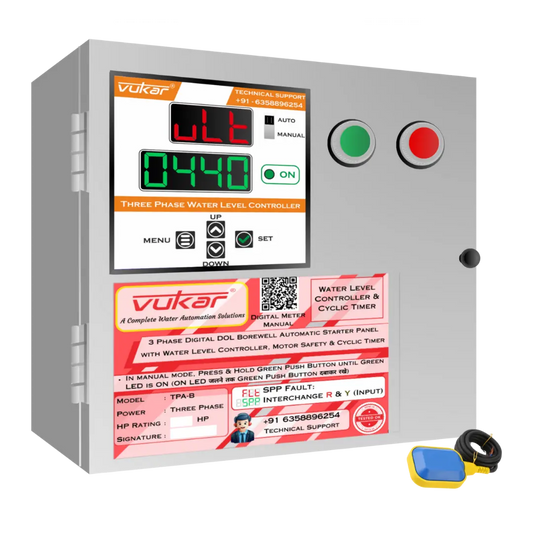
VUKAR digital DOL panel માટે exact model ID જુઓ. Published comparisonમાં અલગ three-phase families છે. Service enquiryમાં panel ID અને fitted contactor code આપો. Coil માટે device label અને service documentation મેળવો. VUKAR DOL comparison.
Purchase request અને handoverમાં શું રાખશો?
- Contactor maker, આખો code અને coil suffix.
- Coil voltage, AC કે DC, frequency અને marked range.
- Motor phase, voltage, nameplate current અને switching duty.
- Start, Stop અને feedback માટે લાગેલા auxiliary contacts.
- Mounting, clearance, overload fit અને suppression accessory.
Maker અલગ coil આપે તો frame અને revision compatibility પૂછો. આખો contactor બદલાય ત્યારે poles અને overload fit પણ મેળવો. Qualified technician approved handoverમાં Start, Stop અને restart behavior લખે. Automatic pump માટે power પાછો આવે ત્યારે level કે timer demandની સ્થિતિ નોંધો. નવી installation માટે Motor starter types guide જુઓ.
Storeમાંથી part બહાર આવે ત્યારે job number સાથે panel ID પણ લખો. સરખી seriesના contactorsને coil voltage અને AC/DC પ્રમાણે જુદા binમાં રાખવાની રીત warehouse માટે ઉપયોગી છે. Box પરનો label photographમાં વાંચી શકાય એવો હોવો જોઈએ. Technician fitted marking જોયા પછી part issue record પૂરો કરે. આગળ બીજી coil માંગાય ત્યારે storekeeper જૂનો repair note શોધી શકે છે.
Enquiryમાં motorની incoming supply અને contactorની control supply માટે બે જુદી lines રાખો. Motor circuit માટે 415 V અને coil માટે 24 V DC હોય ત્યારે બંને લખવાથી supplierને design વાંચવો સહેલો પડે છે. AC coil માટે manufacturerએ frequency અલગ દર્શાવી હોય તો તે પણ લખો. Labelમાંથી જેટલી માહિતી સીધી મળી હોય એટલી જ requestમાં ચોક્કસ મૂકો. બાકી approved drawingથી પૂરી કરાવો.
Repair note technician અને supplier બંનેને મોકલો.